Last Updated: November 8, 2026
Quick Summary
Most log home chinking lasts between 15 and 30 years, though the range swings widely by material: traditional mortar lasts 10-20 years, acrylic synthetics 15-25, premium elastomeric 20-30, and energy-rated systems 30 or more. Installation quality and exposure often matter as much as the product itself.
- Traditional mortar lasts 10-20 years and is stiff, so it cracks as logs move.
- Premium elastomeric synthetic chinking lasts 20-30 years and handles wider log movement.
- Backer rod sizing, joint depth, surface prep, and tooling decide how close you get to the material’s ceiling.
- Inspect full-sun south- and west-facing walls twice a year for cracks and separation.
- Repair isolated bad joints, but replace the system when failure is widespread across the wall.
Table of Contents
- How Long Does Log Home Chinking Last by Material Type
- How Often Does Chinking Need to Be Replaced
- What Shortens Chinking Lifespan: Climate, Log Movement, and Installation
- Signs Your Log Home Chinking Repair Can’t Wait
- A Practical Log Cabin Chinking Maintenance Schedule
- Repair or Replace? A Step-by-Step Decision Guide
- Schedule a Free Chinking Inspection
- Frequently Asked Questions
How Long Does Log Home Chinking Last by Material Type
The short answer: most log home chinking lasts between 15 and 30 years, but that range swings widely depending on what went into the joints. Failed chinking can come out of walls that are only a decade old, while joints can still hold strong after 25 years.
Here’s how the main options compare:
| Material | Typical Service Life | Flexibility | Best For |
|---|---|---|---|
| Traditional mortar | 10-20 years | Low | Historic restorations |
| Acrylic-based synthetic | 15-25 years | Moderate | Budget-conscious owners |
| Premium elastomeric synthetic | 20-30 years | High | Long-term protection |
| Energy-rated systems | 30+ years | High | Cold climates, drafts |
Lifespans vary with exposure and installation. The same product can last far longer on a sheltered wall than on a sun-exposed one with wind-driven rain, and installation practices such as backer rod sizing, joint depth, tooling, and surface prep have a large effect on how long it lasts.
Traditional Mortar vs. Modern Synthetic Chinking
Traditional mortar is a cement-based mix. It looks right on a historic cabin, but it is stiff, and logs move while mortar does not. Hairline cracks can open up, letting water in where freeze-thaw cycles can widen them.
Modern synthetic chinking is a flexible sealant made to stretch and compress with the logs. It bonds to the wood and stays elastic through seasonal expansion and contraction. That flexibility is one reason synthetic chinking is often preferred over mortar.
Why the Same Material Can Last 12 Years or 30
Material grade sets the ceiling, but the installation system sets how close you get to it. Three variables explain most of the spread:
- Backer rod sizing and joint depth. The sealant needs a consistent depth-to-width ratio to flex without tearing. Too shallow, and it can’t stretch. Too deep, and you waste material and get uneven cure.
- Surface prep. Chinking won’t bond to dirty, dusty, or damp logs. Contaminants create a release layer that fails months or years later, not on day one.
- Tooling and cure conditions. Proper tooling presses the sealant into the joint and shapes the bond line. Applying in cold or wet conditions can trap moisture or prevent a full cure.
Installation quality matters as much as the product itself. When comparing options, ask what installation system is included, not just which product is being used.
How to Reconcile Conflicting Lifespan Estimates
You’ll see numbers from 10 years to several decades for the same material category. The estimates usually differ because they describe different conditions: a sheltered wall with annual maintenance versus a fully exposed wall with none, or a system installed with backer rod and proper prep versus one smeared over a dirty joint. When you read a lifespan claim, look for the exposure and installation assumptions behind it. If none are stated, treat the number as a best-case ceiling, not an average. The practical takeaway is to budget for inspection every year and expect the material to reach the upper half of its range only when the installation system and maintenance schedule support it.
Typical Service Life of Log Home Chinking Materials
How Often Does Chinking Need to Be Replaced
Log cabin chinking replacement timing depends on the condition of the joints, with spot repairs often made in between. Replacement isn’t a calendar event, though. It’s a condition-based decision.
A common mistake is waiting for chinking to fall off before acting. By then, water has usually been getting behind the logs for a season or two. We tell owners to judge by condition, not by the age on the label.
What Shortens Chinking Lifespan: Climate, Log Movement, and Installation
Weather exposure is the biggest lifespan shortener, and log movement is a close second. Chinking lives outdoors, so sun, rain, snow, and temperature swings all work on it constantly.
Log movement comes from settling, expansion and contraction, and moisture cycling. Every time a log swells and shrinks, the sealant has to flex with it. If it can’t, it cracks or separates from the wood.
Installation quality decides how well a material handles that stress. A premium product applied badly still fails early.
Why Backer Rod and Surface Prep Decide the Outcome
Backer rod is a foam rod pushed into the joint before chinking goes on. It sets the depth, gives the sealant a shape to bond to, and stops it from sticking to the back of the gap.
Surface prep matters just as much. Chinking won’t bond to dirty, dusty, or damp logs. Clean logs, correct joint depth, and proper tooling all affect how long a chinking job lasts. For a deeper look at keeping water out, see our guide on preventing water damage in log structures.
Signs Your Log Home Chinking Repair Can’t Wait
Cracks, gaps, and separation are the warning signs that log home chinking repair can’t wait. Small cracks let water and air in. Once that starts, the damage moves from the chinking into the logs.
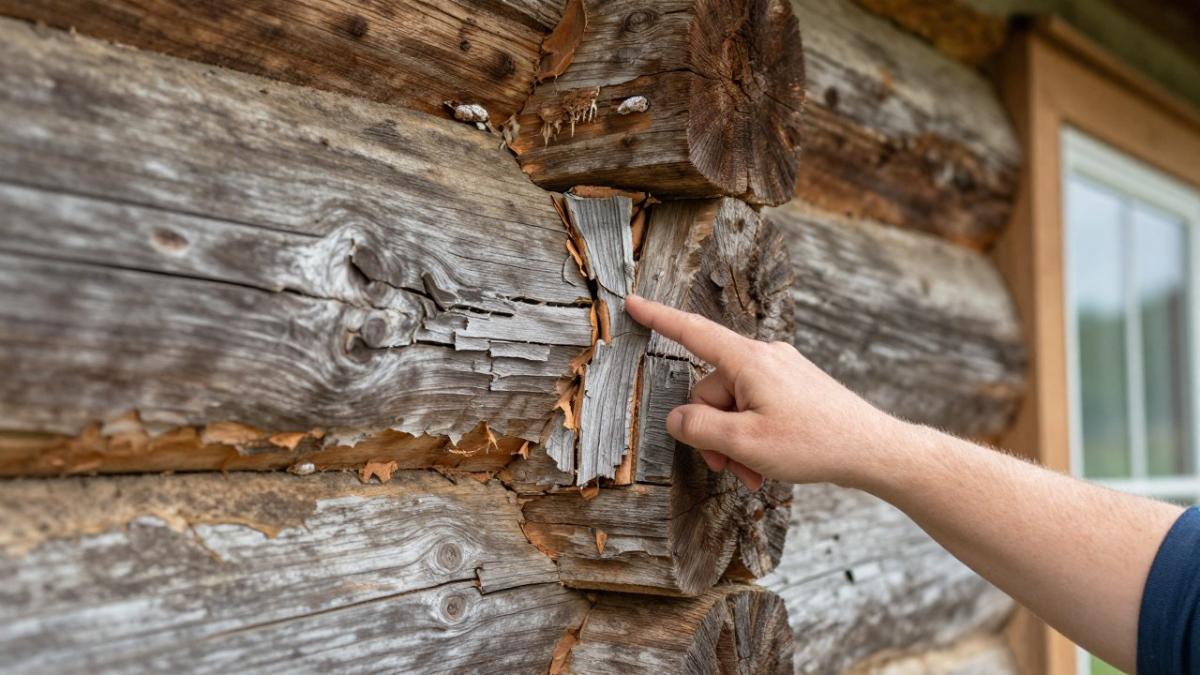
Watch for these:
- Cracks wider than a hairline
- Chinking pulling away from the log edge
- Soft or spongy spots on the logs
- Drafts or higher heating bills
- Visible water staining below joints
Watch out: soft spots on log corners usually mean rot has already started behind the chinking. That’s no longer a caulk-and-go job, and it needs a professional look before you seal anything over it.
A Practical Log Cabin Chinking Maintenance Schedule
A yearly inspection keeps small problems small. Log cabin chinking maintenance doesn’t take much time if you stay ahead of it. What most schedules leave out is what to actually look for and how to clean without damaging the seal, so here’s a schedule with inspection criteria built in.
Annual and Seasonal Schedule
- Spring: Walk the exterior and check every joint for cracks and separation. Use the failure criteria below, not just a glance.
- Spring: Clean logs and chinking with a soft brush and mild cleaner. Rinse thoroughly and let everything dry before judging the seal.
- Summer: Touch up small cracks before the wet season. Mild, dry weather gives the best cure.
- Fall: Recheck seals before freeze-thaw cycles begin. Pay extra attention to south- and west-facing walls and any wall that takes wind-driven rain.
- Every 3-5 years: Have a pro assess the full system, including joints you can’t easily see from the ground.
Inspection Checklist with Failure Criteria
The point of an inspection is to separate harmless surface changes from conditions that warrant repair. Use these criteria:
- Surface discoloration or chalking: Usually cosmetic. Note it and recheck next year.
- Hairline surface cracks: Common as the sealant ages. Monitor; if they widen or multiply, move to repair.
- Cracks wider than a hairline: Repair. Water can enter and freeze.
- Chinking pulling away from the log edge: Repair. This is a bond failure, not a surface issue.
- Chinking that pulls off easily when probed: The bond is gone across that area. Plan for removal and replacement of the section.
- Soft or spongy spots on the logs: Stop. This usually means rot has started behind the chinking. It needs a professional look before you seal anything over it.
- Drafts or higher heating bills: A sign of air infiltration through failed joints. Investigate the joints on the affected walls.
- Visible water staining below joints: Water is getting behind the chinking. Trace the source before sealing.
Safe Cleaning Instructions
Cleaning is where well-intentioned maintenance does damage. A few rules keep the seal intact:
- Use a soft brush and a mild cleaner. Avoid abrasive pads and stiff wire brushes on the chinking itself.
- Don’t use a pressure washer on the chinking. High pressure can lift the bond line and force water behind the seal.
- Rinse thoroughly and let the wall dry before inspecting. Wet chinking hides cracks and makes separation look like a shadow.
- Don’t apply new chinking over damp or dirty logs. The new material won’t bond, and you’ll be back to the same joint next year.
How Climate and Exposure Change the Schedule
A single schedule doesn’t fit every wall. Sun, freeze-thaw cycles, wind-driven rain, humidity, and shelter all shift how often you should inspect:
- Full-sun, south- and west-facing walls: Inspect twice a year. UV and thermal cycling age the sealant faster.
- Walls with heavy freeze-thaw: Check in late fall before the first hard freeze and again in early spring. Water that enters a crack and refreezes widens it.
- Wind-driven rain exposure: Inspect after major storms. Look for separation on the windward side.
- Sheltered walls under deep eaves: Once a year is usually enough, but don’t skip it, sheltered walls can hide slow bond failures.
- High-humidity areas: Watch for moisture trapped behind the seal and for surface mold that can mask bond problems.
Our log home maintenance guide walks through the full year-round plan, and if your inspection turns up widespread failure, the repair-or-replace guide below explains how to decide what comes next.
Repair or Replace? A Step-by-Step Decision Guide
Repair makes sense when the failure is isolated. Replace when the system is failing across the wall. Here’s how we decide:
- Map the damage. Note every cracked or separated joint.
- Check the bond. If chinking pulls off easily, the bond is gone.
- Test for softness. Poke the logs near failed joints.
- Weigh the spread. A few bad joints mean repair. Widespread failure means replacement.
- Match the material. New chinking must bond to what’s already there.
- Plan the season. Mild, dry weather gives the best cure.
Before you commit to replacement, it’s worth understanding how chinking repair warranty terms work so you know what’s covered.
Schedule a Free Chinking Inspection
You don’t have to guess how long your chinking will last. A hands-on inspection tells you exactly where it stands.
Midwest Maintenance LLC has handled log home restoration and chinking since 2008, with free consultations and a team that works on both wood and masonry. See our log home repair services or explore our chinking and caulking options to get started.
Your chinking is the first line of defense for your log home, and it deserves a real assessment rather than a guess. Midwest Maintenance LLC offers free consultations, dedicated log home expertise, and full wood and masonry restoration care.
Frequently Asked Questions
How often does chinking need to be replaced?
Synthetic and traditional mortar chinking have different service lives, and replacement timing depends on condition. The schedule depends on material quality, installation, log movement, and weather exposure. Rather than working from a fixed calendar, inspect the log joints each year and replace when you see cracking, separation from the logs, or gaps that let air and water through. A well-installed synthetic system on stable logs can reach the upper end of that range.
Does the type of chinking affect how long it lasts?
Yes, significantly. Traditional mortar is rigid and can crack as logs expand and contract. Modern synthetic chinking stays more flexible and bonds to the wood, and its lifespan depends on the product and how it is applied over proper backer rod with clean, prepared surfaces. Material choice is the single biggest factor in log home chinking lifespan.
Can you apply new chinking over old chinking?
Sometimes, but only when the existing chinking is still firmly bonded with no cracking, separation, or soft spots. A fresh bead applied over failing material will pull away with it. The reliable approach is to remove loose or cracked sections, clean the log surfaces, and apply new chinking to sound substrate. For widespread failure, full removal and replacement is the better investment. A professional inspection can tell you which path fits your log home chinking repair needs.
What are the signs that log home chinking needs repair?
Watch for cracks wider than a hairline, chinking pulling away from the logs, soft or crumbly texture, visible gaps you can see daylight through, drafts inside the home, and water stains on interior walls near log joints. Any of these means air and moisture are getting in. Address small failures early with targeted log home chinking repair before water reaches the logs and causes rot, which turns a sealant job into structural work.


Comments are closed