Table of Contents
- Why Ice Dams Form at Roof Edges and Eaves
- Step 1: Diagnose the Cause of Recurring Ice Dams
- Step 2: Improve Roof Insulation for Ice Dams
- Step 3: Use Roof Ventilation to Prevent Ice Dams
- Step 4: How to Remove Snow from a Roof Safely
- Step 5: Heat Cables for Ice Dams and Other Edge Defenses
- Step 6: Clear Gutters, Downspouts, and Roof Drainage
- Step 7: Verify Your Prevention Work Actually Works
- Frequently Asked Questions
Last Updated: October 16, 2026
Why Ice Dams Form at Roof Edges and Eaves
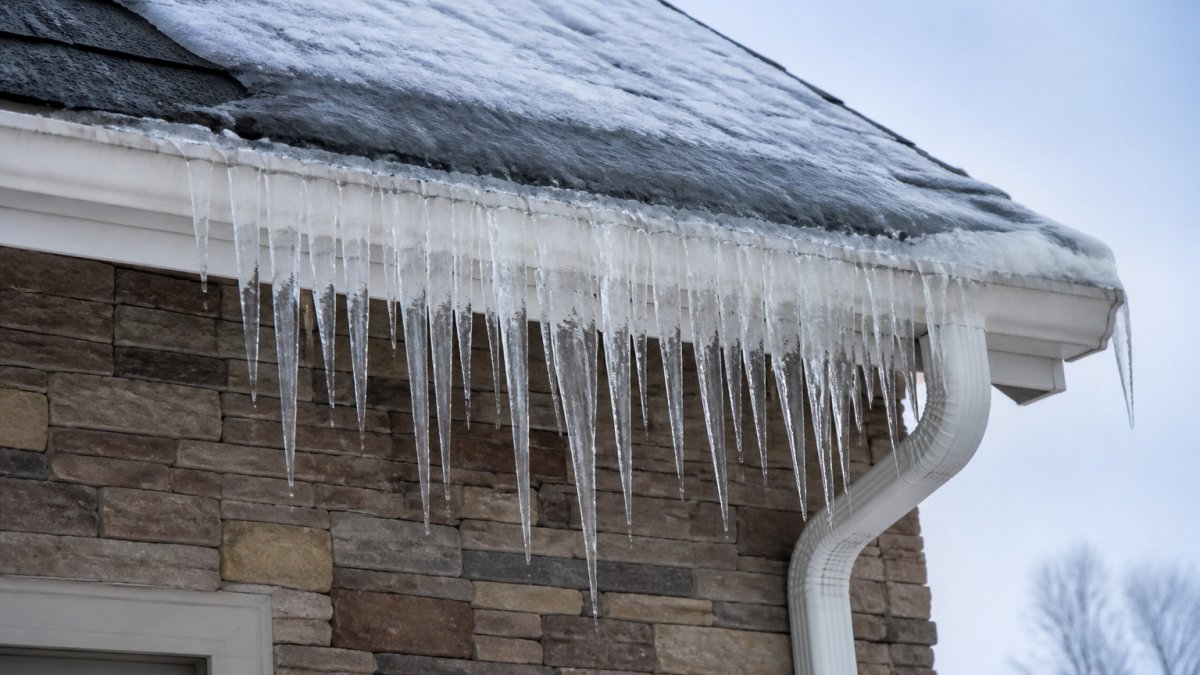
An ice dam is a ridge of ice that forms along the lower edge of a roof and blocks melting snow from draining off. Water then backs up under the shingles, seeps into the attic, and shows up as a stain on your ceiling weeks later.
Preventing ice dams on roof edges starts with understanding one fact: the dam is a symptom, not the disease. The real problem sits above it, in a warm attic.
How Snow, Melting, and Refreezing Build an Ice Dam
Snow sits on the roof. Heat escaping from the house melts the bottom layer. That meltwater runs down the slope, hits the cold eave, and refreezes.
Repeat that cycle for a few days and the ice grows into a dam. More meltwater pools behind it.
Roofs in the Lakes area see this pattern often. Big snowfall, a cold snap, then a mild afternoon.
The Role of Attic Heat Loss and Roof Design
Warm attic air does the damage. Heat leaks through the ceiling, warms the roof deck, and melts snow from below, while the eave stays cold because it hangs past the heated wall.
Roof design makes it worse. Low slopes, complex valleys, and long unheated overhangs all trap snow and slow drainage. A steep, simple roof sheds snow fast.
So the fix is rarely one thing. It’s a system: stop the heat, move the air, and keep water flowing.
Step 1: Diagnose the Cause of Recurring Ice Dams
Before you buy anything, find out why your roof keeps icing. The fix for a warm attic is not the fix for a clogged gutter, and treating the wrong cause wastes a season.
Run this diagnostic after the first cold snap:
- Check the attic on a freezing day. If the roof deck feels warm or you see frost melting near the ridge, you have a heat problem.
- Look for icicles at one bay only. A single bad spot points to a localized air leak, not a whole-attic issue.
- Inspect the gutters from the ground. Ice filled with leaf debris means drainage, not insulation.
Write down what you find. That list tells you which of the next steps actually applies to your house.
Homeowners can photograph the attic and the eave line in January, then again in March. Comparing the two sets of photos often reveals whether the problem is heat loss or drainage, and it gives you a record if you ever file a claim.
Step 2: Improve Roof Insulation for Ice Dams
Roof insulation for ice dams works by keeping attic heat out of the roof deck.
Aim for a deep, even layer across the whole ceiling.
Don’t stop at the flat ceiling. Insulate and seal the attic hatch, knee walls, and any ductwork running through the space.
One caution: adding insulation over a wet or moldy deck traps moisture. Fix leaks first, then insulate.
Air Sealing Attic Leaks Before Adding Insulation
Air sealing comes before insulation, always. Warm air escaping through a gap carries far more heat than the same area of bare fiberglass.
Find the leaks on a cold day with a bright light in the attic and a helper in the room below. Look for light, or feel for cold drafts around:
- Ceiling light fixtures and outlets
- Plumbing vent pipes and chimney chases
- Top plates where walls meet the ceiling
Seal small gaps with caulking. Fill larger openings with expanding foam. Around chimneys and flues, use a fire-rated sealant and keep clearance from the hot pipe. Most hardware stores carry everything you need for a weekend of work.
Step 3: Use Roof Ventilation to Prevent Ice Dams
You need two things working together: intake at the soffit and exhaust at the ridge or gable. One without the other does little.
Check the soffit vents first. They clog with paint, insulation, and dust more often than people expect.
Balance matters too. Intake area should roughly match exhaust area. If you’re unsure, a roofer can measure it in an afternoon.
Never cover soffit vents to add insulation. Blocking intake air turns a vented attic into a sealed hot box, and ice dams get worse, not better.
Step 4: How to Remove Snow from a Roof Safely
The safest way to remove snow is from the ground with a roof rake. Stay off the roof. Every winter, homeowners fall while shoveling roofs, and the injuries are often serious.
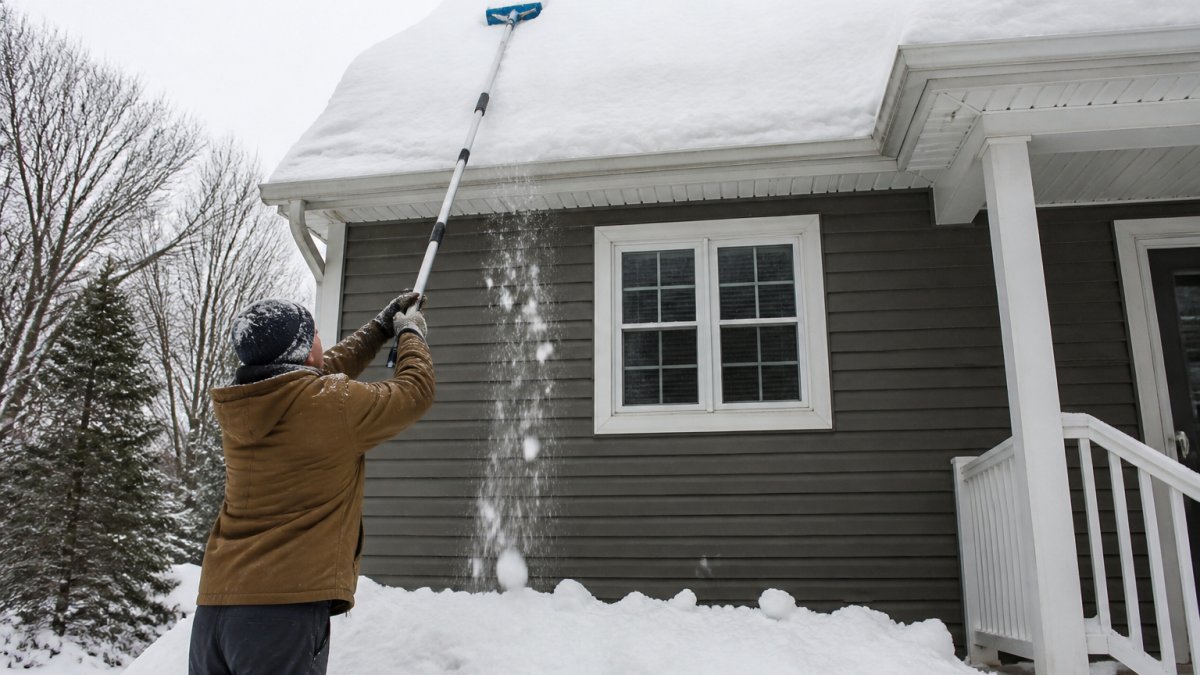
Follow these rules:
- Rake after every major snowfall. Don’t wait for a foot to pile up. The deeper the snow, the heavier each pull.
- Pull snow, don’t push it. Work it down the slope in small pulls.
- Leave a thin layer. Scraping to the shingles can damage them, and damaged shingles leak.
For a roof that’s too steep or too high, hire it out. Preventing ice dams on roof edges is cheaper than a hospital visit.
When to Stop and Call a Professional
Stop immediately if any of these are true:
- The roof pitch is steep enough that you can’t stand safely. As a rough guide, anything steeper than about 6:12 is a poor candidate for DIY work.
- Ice has already built up into a thick dam. Chipping at it can tear shingles and flashing.
- You see sagging, cracked shingles, or water stains inside. That’s a sign water is already getting in, and the fix is bigger than snow removal.
Professionals have the right tools and insurance. We handle ice dam removal for homes in the greater Lakes area, and we’d rather take the call than read about a fall.
Documenting Damage and Checking Coverage
If water has already come inside, treat it like any other home damage claim:
- Photograph everything before you clean up. Ceiling stains, bubbling paint, wet insulation, and the ice dam itself. Include a wide shot and a close-up.
- Note the date and weather. Insurers and adjusters ask when the damage likely started.
- Keep receipts. Rake, cable, and any emergency removal costs may be reimbursable depending on your policy.
A quick call to your agent before the next storm tells you what your policy actually covers, which is far better than finding out after the ceiling comes down.
Keep a winter log with dates, weather, photos, and any work done. If you file a claim, that log is the difference between a smooth process and a disputed one.
Step 5: Heat Cables for Ice Dams and Other Edge Defenses
Heat cables for ice dams keep a narrow channel open along the eave so meltwater can drain. They work, but only as a supplement. They don’t fix a warm attic, and they don’t stop a dam from forming higher up the slope.
Install them in a zigzag pattern along the eave and into the downspout. Run them before the first freeze; installing on an icy roof is dangerous.
What Each Edge Defense Actually Costs and Delivers
Here’s the honest trade-off picture, using typical installed prices in U.S. dollars:
- Heat cable. Materials and installation commonly run about $5 to $15 per linear foot, so a 100-foot eave can land between $500 and $1,500 before you add a controller or timer. Lifespan is often 5 to 10 years, and the cable can be damaged by roof rakes or by ice itself. It treats the symptom, not the cause.
- Ice-and-water protection membrane. Installed under the shingles at the eave, this is a self-adhering leak barrier that stops backed-up water from getting in. It’s usually priced by the roll and is cheapest to add during a reroof, since the shingles have to come up anyway. It does not prevent ice dams; it limits the water damage when one forms.
- Metal roof and snow guards. A metal roof sheds snow fast, which reduces the time meltwater has to refreeze, but it also releases snow in sheets. Snow guards break that slide into smaller drops. Expect a meaningful premium over asphalt, and expect the snow guards to need periodic inspection.
How to Choose Without Wasting Money
Match the defense to the cause you found in Step 1:
- If your attic runs warm, spend on air sealing and insulation first. Heat cable on a warm roof is a recurring bill that never solves the problem.
- If your roof is cold but water still backs up, the leak barrier and clear drainage matter more than cable.
- If you have a low-slope or complex roof that ices no matter what, cable plus a leak barrier is a reasonable belt-and-suspenders approach.
A common pattern is homeowners buying cable first because it’s visible and fast, then paying for insulation a year later anyway. Doing the durable work first usually costs less over a decade, even though the upfront number is higher.
Heat cable is not a substitute for a cold roof deck. If you install cable and skip the attic work, expect the same dam in a colder, snowier year.
Step 6: Clear Gutters, Downspouts, and Roof Drainage
A clogged gutter turns a small ice problem into a big one.
Clean gutters in late fall, after the leaves drop. Clear downspouts too. A downspout packed with debris backs water up under the eave and feeds the dam.
Check the ground at each downspout. If water pools next to the foundation, extend the discharge further out.
Repeat the check midwinter on a mild day. A five-minute look can save a ceiling repair.
Step 7: Verify Your Prevention Work Actually Works
You can’t confirm prevention worked until the next thaw. So plan to check, and check the same way each year.
Here’s how to verify:
- Watch the eave during the first thaw. Does water drip off freely, or pool and refreeze?
- Check the attic after a cold snap. A cold deck means your insulation and air sealing are doing their job.
- Look for new icicles. Fewer icicles at the same spot means the fix held.
If the dam returns in the same place, you missed a cause. Go back to Step 1 and re-diagnose. Preventing ice dams on roof edges is a process, not a one-time purchase.
The homes that stay ice-free share one trait: a cold roof deck and clear drainage. Everything else is a backup.
Frequently Asked Questions
What causes ice dams to form along roof edges?
Ice dams form when attic heat escapes through a poorly insulated or air-leaky ceiling and warms the roof deck above the eaves. Snow on the upper roof melts, and that meltwater runs down to the colder roof edge, where it refreezes. Repeated freeze-thaw cycles build a ridge of ice that traps water behind it. That trapped water backs up under shingles, through the roof deck, and into the house, causing roof leaks, stained ceilings, and water intrusion.
Does adding insulation help prevent ice dams?
Yes, when it is paired with air sealing. Roof insulation for ice dams works by keeping attic heat out of the roof deck, so snow on the roof stays cold and does not melt and refreeze. Fiberglass batts alone often underperform because warm air still leaks around pipes, chimneys, and top plates. Seal those gaps with caulk and expanding foam first, then add insulation to the recommended R-value for your climate zone. This combination is the most durable fix for recurring ice dams on roof edges.
Should I remove snow from my roof to prevent ice dams?
Yes, when snow depth exceeds roughly 6 inches, removing it reduces the meltwater supply that feeds an ice dam. The safe method is a roof rake with an extendable handle used from the ground, pulling snow down the slope without touching shingles. Never climb onto a snow-covered or icy roof, and never chip at ice with an axe, hammer, or ice pick. If snow is deep, the roof is steep, or ice has already formed, call a roofing professional with the right equipment and insurance.
Do heat cables prevent ice dams on roof edges?
Heat cables for ice dams melt a narrow channel along the eaves and inside gutters, which helps meltwater drain instead of backing up. They work best as a supplement to insulation, air sealing, and ventilation, not as a replacement. Expect to pay for electricity all winter, and plan on professional installation to route cables correctly. Without fixing the attic heat loss that causes the problem, heat cables only manage the symptom and often fail during extended cold snaps.
Ice dams are stubborn, and a warm attic or a clogged gutter will bring them back every winter. That’s where Midwest Maintenance LLC comes in. Since 2008, we’ve handled ice dam removal and exterior maintenance for homes across the greater Lakes area, with free consultations to pinpoint what’s actually causing your problem. Our team also cares for log homes, decks, and masonry, so one call covers more than the roof. Call today and get ahead of the next freeze.

Comments are closed