Last Updated: October 27, 2026
Quick Summary
A chinking repair warranty is a written promise from your contractor to fix defects in their work for a set period, and it does not cover normal wear or maintenance. It contains two separate promises: workmanship coverage for installation errors and product coverage from the manufacturer for defects in the sealant itself. Get both warranties in writing before work starts, because written terms control what you can actually claim.
- Workmanship and product warranties often run on different timelines with different claim processes.
- If the product warranty is 15 years but workmanship is 1 year, installation errors are covered for only 1 year.
- Photograph any failure before touching it, since homeowner alterations are a common exclusion.
- Most warranties require written notice, often within 30 days of discovery, with a 15 to 30 day response window.
- Ask your contractor which quality-control checkpoints they document, since photographed stages give you claim evidence.
Table of Contents
- What Log Home Chinking Repair Warranty Coverage Actually Includes
- How Long Log Home Chinking Lifespan Should Be and What Warranty Length to Expect
- Chinking Warranty Exclusions and Homeowner Responsibilities
- Your Log Home Repair Contract Checklist Before You Sign
- Quality-Control Checkpoints During the Chinking Repair Process
- What to Do When Repaired Chinking Fails During the Warranty Period
- Schedule a Free Chinking Inspection Before You Sign Anything
- Frequently Asked Questions
What Log Home Chinking Repair Warranty Coverage Actually Includes
A chinking repair warranty is a written promise from your contractor to fix defects in their work for a set period. It is not a maintenance plan and does not cover normal wear.
Two very different promises hide inside one document:
- Workmanship coverage protects you against installation errors. Think gaps that pull away, uneven curing, or chinking that fails to bond to the log surface.
- Product coverage protects you against defects in the sealant itself. This comes from the manufacturer, not your contractor.
These two warranties often run on different timelines with different claim processes. A failed bead of chinking might be a workmanship issue, a product issue, or both.
The FTC guidance on home improvement contracts reminds homeowners that written terms control what you can actually claim. Get both warranties in writing before work starts.
Workmanship Versus Product Coverage
Workmanship asks: did the crew install it correctly? Product coverage asks: was the material itself faulty?
A strong contract separates the two, naming the manufacturer, listing the product, and stating how long each warranty lasts. If your contract blends them into one vague “guarantee,” ask for details before signing.
What a Strong Coverage Clause Looks Like
A good clause is specific and readable. It should state:
- What is covered, in plain language
- How long coverage lasts
- Who pays for labor versus materials
- How to file a claim
- What response time you can expect
How Long Log Home Chinking Lifespan Should Be and What Warranty Length to Expect
Chinking lifespan is the output of four variables: sealant chemistry, joint design, surface preparation, and joint movement. A warranty that ignores them is marketing, not a coverage promise. The useful question is not “how many years?” but “how many years under what conditions, and who pays when those conditions are met and the chinking still fails?”
What actually drives chinking lifespan
- Movement and exposure. Log homes move. Settling, shrinkage, and seasonal expansion strain every joint. South- and west-facing walls see more UV and thermal cycling, and high-freeze-thaw regions see more joint fatigue. A warranty that ignores orientation and climate is not calibrated to your home.
What warranty length to expect
- The overlap is what protects you. If the product warranty is 15 years but the workmanship warranty is 1 year, you are covered for material defects for 15 years but installation errors for only 1. Since most failures are installation-related, the workmanship term matters most.
Questions that expose a weak warranty length
- Does the term start at substantial completion or at final payment?
- Is the term the same for horizontal joints, vertical joints, and around penetrations (windows, doors, pipes)?
- Does the term reset if the contractor performs a warranty repair, or does it continue from the original date?
- Is the term prorated, and if so, on what schedule?
- Does the term survive if you sell the home? (Transferability is covered in the contract checklist section.)
Chinking Warranty Exclusions and Homeowner Responsibilities
If you are worried about rot behind failed chinking, learn whether log rot can be repaired and how it affects coverage.
Your Log Home Repair Contract Checklist Before You Sign
| Warranty Element | What to Check | Why It Matters |
|---|---|---|
| Workmanship term | Length in years | Shows contractor confidence |
| Product warranty | Manufacturer name and term | Covers material defects |
| Exclusions | Listed clearly | Prevents claim denials |
| Claim process | Steps and timelines | Speeds up fixes |
| Maintenance duties | Your obligations | Keeps coverage valid |
Quality-Control Checkpoints During the Chinking Repair Process
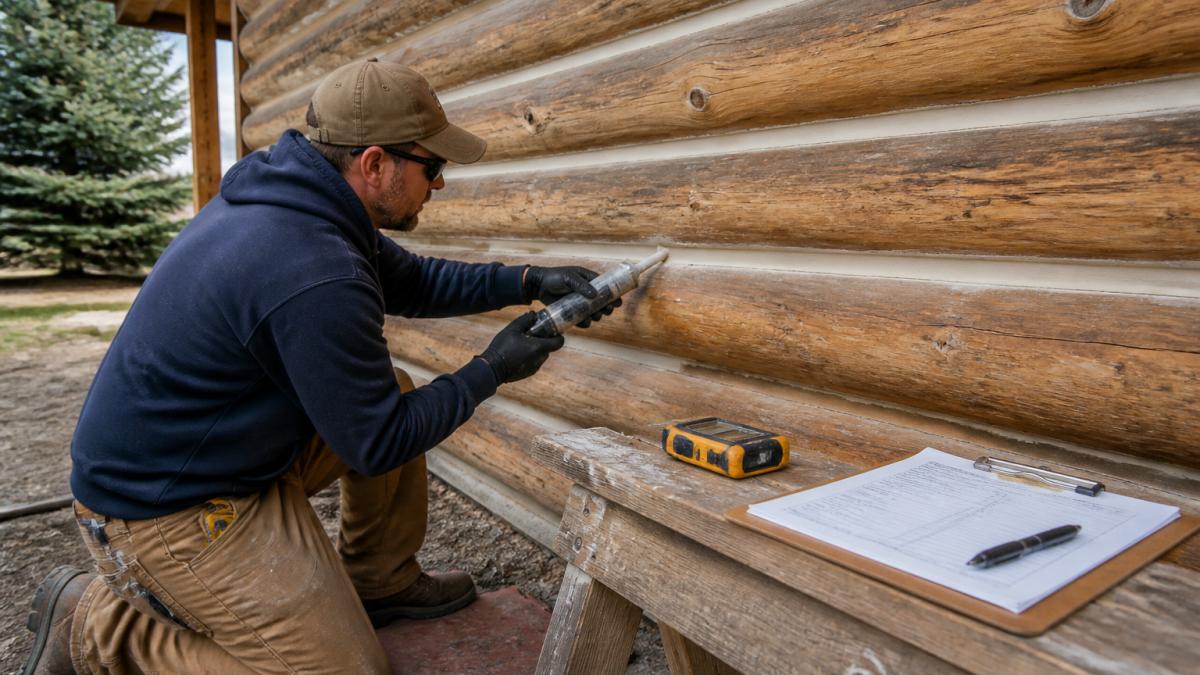
Key checkpoints to ask about:
- Surface preparation – old chinking removed and logs cleaned
- Moisture check – logs dry enough for bonding
- Backer rod install – proper joint depth and shape
- Application – correct temperature and thickness
- Curing inspection – bonds checked before sign-off
Ask which checkpoints your contractor documents. A crew that photographs each stage gives you evidence if a claim comes up.
What to Do When Repaired Chinking Fails During the Warranty Period
A warranty claim is a documentation exercise before it is a repair. The homeowner who wins can show what failed, when, under what conditions, and that they gave written notice within the term. The one who loses called, was told “that’s settling, not covered,” and had no records. Here is the process that holds up.
Step 1: Preserve the evidence before you touch anything
Photograph the failure the day you notice it. Include:
- A wide shot showing the wall, roofline, and grade so the location is identifiable.
- A close-up of the failed joint showing whether the sealant tore at the bond line (adhesion failure) or split through the middle (cohesion failure), that distinction often decides whether the claim is workmanship or product.
- A scale reference, a tape measure or coin in frame, so the gap width is documented.
- A date stamp. Most phones embed it; if yours does not, include a dated newspaper or a screenshot of the date.
Do not scrape, caulk, or “touch up” the failure before the contractor inspects. Homeowner alterations are a common exclusion, and a DIY repair can void the claim on that joint.
Step 2: Write down the conditions
Note the weather before the failure (freeze-thaw, heavy rain, high wind), the wall orientation (south- and west-facing walls fail first), and whether it followed a known event (a storm, foundation repair, new roof). Get your version of the cause on record first.
Step 3: Read the claim clause and follow it exactly
Most warranties specify a notice method (written, certified mail, email to a named address), a deadline (often 30 days from discovery), and a response window (often 15 to 30 days for inspection). Follow the method and deadline even if you also call, a phone call is not notice under most written warranties.
Step 4: Separate the workmanship claim from the product claim
If the contractor says “that’s a product issue, call the manufacturer,” ask them to put that in writing and provide the product name, batch or lot number if available, and the purchase date. If they say “that’s settling, not covered,” ask them to identify the specific exclusion language and explain why the joint design did not account for the movement.
Step 5: Get the inspection in writing
A fair contractor will inspect and give you a written cause determination. Ask for:
- The date of inspection and who attended.
- The stated cause (adhesion, cohesion, movement, moisture, substrate).
- Whether the repair is covered, partially covered, or denied, and the specific warranty language relied on.
- The proposed remedy and timeline.
If the contractor will not put the determination in writing, that is itself a red flag worth documenting.
Step 6: Escalate if the claim stalls
If the contractor denies a claim you believe is covered, the escalation path depends on your state. Many states license home improvement contractors and have a contractor licensing board or consumer protection division that accepts complaints; some states require a written demand and a cure period before further action. The FTC guidance on home improvement contracts explains your right to the written terms and to clear disclosure, and your state attorney general’s consumer protection office is the usual next stop. For larger claims, a construction attorney who handles warranty disputes can review the contract and the notice record.
Schedule a Free Chinking Inspection Before You Sign Anything
At Midwest Maintenance LLC, we have cared for log homes and wood structures since 2008. You can also book a local log home repair inspection before you sign. We offer free consultations, so you can see the real scope before committing. Our team handles log home restoration and chinking.
Frequently Asked Questions
What should a log home chinking repair warranty cover?
A solid chinking repair warranty should spell out two things: the contractor’s workmanship and the sealant manufacturer’s product coverage. Workmanship coverage protects you if the chinking pulls away from the logs, cracks at the bond line, or fails to adhere because of poor surface preparation. Product coverage handles defects in the sealant itself. Ask for both in writing and confirm whether labor to redo the repair is included, since materials-only coverage leaves you paying for the crew a second time.
How long does chinking repair usually last?
Chinking lifespan depends on the product, the climate, and how well the surface was prepared. Properly applied quality chinking on a log home in a freeze-thaw climate often holds for 10 to 20 years before it needs touch-ups or partial replacement. Warranty length should reflect that reality: a one-year workmanship guarantee is short for this kind of work, while multi-year coverage on both adhesion and material is a better signal of confidence in the job.
What can void a log home chinking warranty?
Common chinking warranty exclusions include pressure washing the chinking, applying a different brand of sealant or stain over it, letting unchecked water infiltration or wood rot spread behind the logs, and skipping required inspections or touch-ups. Structural movement, settling, and storm damage are usually excluded too. Read the exclusions page before you sign and ask the contractor exactly which maintenance steps you must complete to keep coverage active.
What should I do if repaired chinking fails during the warranty period?
Document the failure first: photograph the cracks or separation, note the date and weather conditions, and stop any work that could be blamed for the damage. Then notify the contractor in writing, referencing the warranty clause and requesting an inspection. Keep records of every call and email. If the contractor won’t respond, check whether the warranty names a dispute process or a manufacturer-backed remedy, and get a second opinion from an inspector before authorizing anyone else to touch the chinking.
Signing a chinking repair warranty without understanding the terms puts your investment at risk. Midwest Maintenance LLC brings dedicated log home and wood care expertise, free consultations, and comprehensive restoration and maintenance services to help you protect your home for the long run. Get started with Midwest Maintenance LLC and sign your next repair contract with confidence.


Comments are closed