Table of Contents
- Identifying Soft Spots and Assessing Damage
- Understanding Causes of Log Rot and Moisture Intrusion
- Diagnosing and Addressing Log Home Moisture Damage
- Removing Decayed Wood Back to Sound Wood
- Drying and Treating the Repair Area
- Using Wood Epoxy for Rotted Logs
- When to Replace Rotten Logs in a Log Cabin
- Chinking and Log Sealant Repair for Prevention
- Frequently Asked Questions
Last Updated: October 19, 2026
Identifying Soft Spots and Assessing Damage
Soft spots in log homes signal decay that demands immediate attention. These areas feel spongy or compress under pressure, indicating moisture has compromised the wood’s structural integrity. Catching rot early saves money and prevents deeper damage that spreads through your home’s frame.
The first step is learning to recognize what you’re looking for. Soft spots appear as discolored patches, often darker than surrounding wood. The surface may feel wet even when weather has been dry. Paint or stain may bubble or peel over these areas. You might notice a musty smell near affected logs.
The Fingernail Test and Probe Method
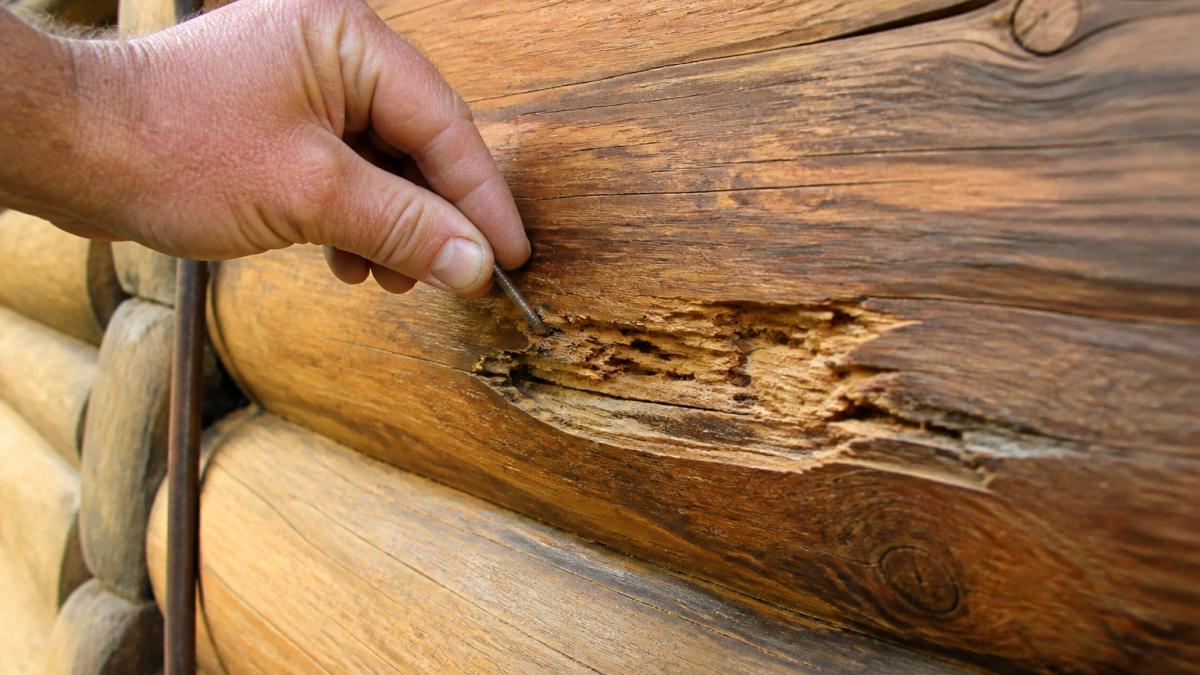
Start with the fingernail test. Press your fingernail firmly into suspect wood. Sound wood resists and your nail stops. Rotted wood accepts your nail easily, sinking in without resistance. This simple check takes seconds and costs nothing.
For deeper assessment, use a probe tool or sharp chisel. Push it gently into the wood at a slight angle. Solid wood feels dense and stops the probe. Decayed wood accepts the probe with little resistance. Listen for the difference too. Tapping sound wood produces a solid thunk. Tapping soft spots sounds hollow and dull.
Mark all suspect areas with chalk or tape. This creates a visual map of damage extent. You’ll reference this map when deciding repair versus replacement strategy.
Distinguishing Surface Rot from Structural Decay
Not all soft spots threaten your home’s safety. Surface rot affects only the outer layer of wood. Structural decay penetrates deep into the log, compromising load-bearing capacity.
Surface rot typically stays within the first quarter-inch of wood. It results from weather exposure and moisture sitting on the surface. This type responds well to epoxy repair. The underlying wood remains sound and can support the repaired section.
Structural decay runs deep. When your probe sinks more than half an inch easily, you’re dealing with serious damage. This rot has compromised the log’s ability to carry weight. Structural decay usually means log replacement, not repair.
Check the log’s position too. Logs supporting roof weight or floor joists demand higher standards. A soft spot on a non-load-bearing decorative log differs dramatically from one on a corner support post. Load-bearing logs with deep decay need replacement. Non-load-bearing logs can sometimes be repaired even with moderate damage.
Understanding Causes of Log Rot and Moisture Intrusion
Rot doesn’t appear randomly. It follows moisture. Understanding what brings water into contact with your logs helps you prevent future problems after repair.
The most common culprit is poor drainage around the foundation. Water pools against the log base instead of flowing away.
Roof leaks create another major pathway. Water enters from above and runs down inside wall cavities. It soaks into logs where it sits trapped.
Chinking failure opens doors to moisture intrusion. When chinking cracks or pulls away from logs, rain drives directly into the gaps. Wind-driven rain penetrates deep into these spaces.
Condensation forms inside walls when warm interior air meets cold exterior surfaces. In winter, this moisture condenses on the back side of exterior logs.
Ground contact is particularly damaging. Logs touching soil or sitting in mulch absorb moisture constantly. Soil stays damp longer than exposed wood. This creates ideal conditions for rot fungi to thrive.
Diagnosing and Addressing Log Home Moisture Damage
Before you repair soft spots in log home structures, identify and stop the moisture source. Otherwise, rot returns within months or years. You’re treating the symptom, not the disease.
Start by observing where damage clusters. Soft spots concentrated near the foundation suggest drainage problems. Damage running down from the roof points to roof or gutter issues.
Look for active water movement. After rain, check for water stains, dampness, or drips inside your home. Water follows gravity and the path of least resistance.
Check your gutters and downspouts. Gutters should slope toward downspouts. Debris should be cleared monthly. Downspouts should extend at least four feet from the foundation.
Inspect chinking closely. Run your finger along the chinking lines. Gaps mean water can enter. Cracked or crumbling chinking needs replacement.
Examine grading around your home. Soil should slope away from the foundation. If water pools near your logs or flows toward them, you need to regrade.
Removing Decayed Wood Back to Sound Wood
Once you’ve stopped the moisture problem, it’s time to remove the damaged wood. This step is critical. Leaving even small pockets of rot means decay continues spreading.
Use a sharp chisel or gouge. Start at the edge of the soft spot. Work inward, removing wood layer by layer. Test frequently with your probe. Stop only when you reach solid wood that resists the probe completely.
The cavity you create will be irregular. That’s correct. You’re following the decay, not creating a geometric shape. Trying to cut a neat rectangle often leaves soft wood inside the corners.
Tools and Safety Precautions
Wear a respirator rated for wood dust. Decayed wood produces spores and dust that irritate lungs. A standard dust mask isn’t sufficient. Use a half-mask respirator with appropriate cartridges.
Safety glasses protect your eyes from flying chips. Work gloves protect your hands from splinters and sharp tool edges. If you’re working overhead, wear a hard hat.
Use sharp tools only. Dull chisels slip and cause accidents. Keep your free hand behind the tool, never in line with the blade direction. Work deliberately and slowly. Rushing causes mistakes and injuries.
Ensure good lighting in your work area. You need to see exactly what you’re doing. Shadows hide remaining decay. Position lights to illuminate the cavity clearly.
Check for hidden hazards before starting. Logs may contain old nails or metal hardware. These can damage tools and cause injury. Use a metal detector if you suspect metal in the wood.
Drying and Treating the Repair Area
After removing all decayed wood, the cavity must dry completely before repair. Moisture trapped under epoxy causes failure. The repair will separate and rot will resume.
Open the cavity to air circulation. Remove any loose debris.
In dry conditions, wood dries quickly. In humid conditions, drying takes longer. A cavity in interior logs dries faster than one on an exterior wall.
You can speed drying with fans. Position a fan to direct air across the cavity. This increases air circulation and evaporation. In winter or damp climates, a heat source helps.
Test for dryness before proceeding. Touch the cavity with your bare finger. It should feel dry, not cool or damp. If it feels cool, moisture remains. Wait longer before applying treatment.
Once dry, apply a wood preservative or borate treatment. These products kill existing fungi and prevent new growth. Follow product instructions for application. Most require brushing or spraying into the cavity.
Using Wood Epoxy for Rotted Logs
Wood epoxy fills cavities and restores structural strength. It bonds permanently to sound wood and hardens to a solid mass. For surface rot and shallow decay, epoxy repair works well.
Choose an epoxy rated for wood repair. Two-part epoxies mix resin and hardener. Read the instructions carefully. Mixing ratios must be exact. Too much hardener causes brittleness. Too little leaves the epoxy soft.
Mix only as much as you’ll use in 15 to 20 minutes. Epoxy begins hardening once mixed. Leftover material hardens in the container and is wasted. Work in moderate temperatures. Cold slows curing.
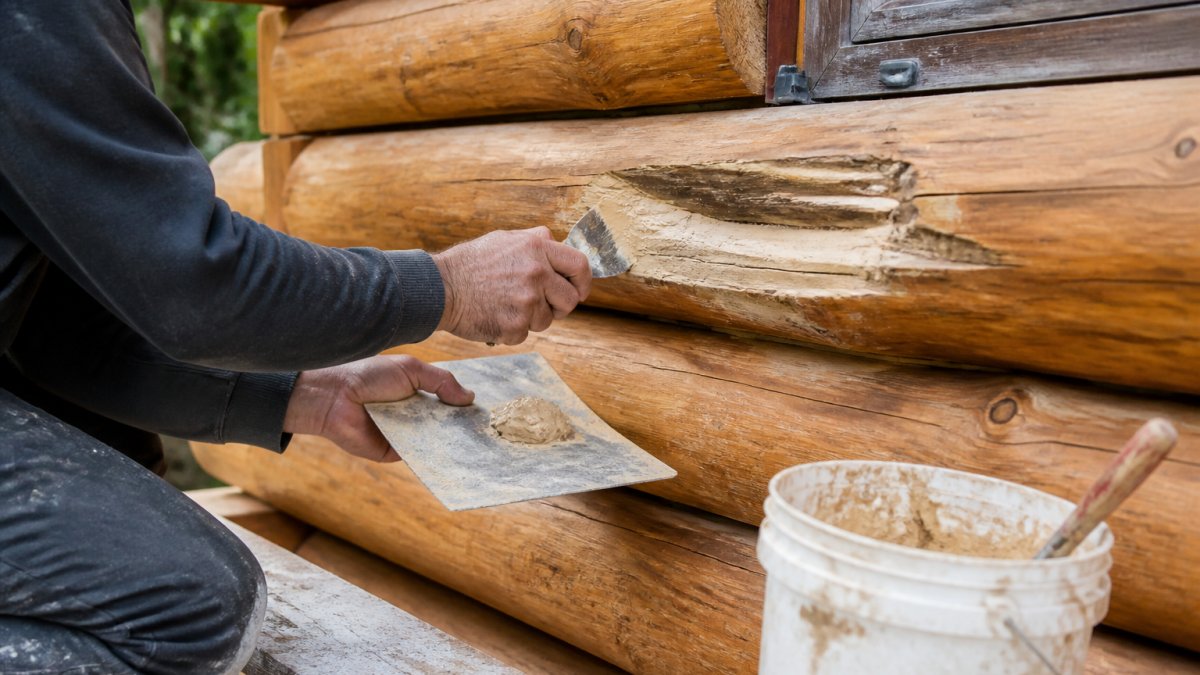
Apply epoxy into the cavity with a putty knife or brush. Pack it firmly, eliminating air pockets. Overfill slightly. The epoxy shrinks as it cures. Overfilling compensates for this shrinkage.
Smooth the surface level with surrounding wood. Use a putty knife or chisel. Work quickly before epoxy hardens completely. Once fully cured, sand the repair smooth and level.
When to Use Wood Hardener Versus Epoxy
Wood hardener penetrates soft wood and hardens it in place. It’s useful for shallow softness where wood structure remains intact. The hardener soaks in and creates a solid surface.
Wood hardener works best when decay is minimal. If the wood is only slightly soft and the damage is less than a quarter-inch deep, hardener may be sufficient.
The limitation is that hardener doesn’t fill cavities. It hardens existing wood but doesn’t replace material that’s been removed. If you’ve carved out a significant cavity, you need epoxy to fill it.
For most repair soft spots in log homes situations, epoxy is the better choice. It fills cavities, restores shape, and provides structural support. Hardener is a supplementary treatment for borderline cases.
Some professionals use both. They apply hardener to the surrounding wood to harden any marginally soft areas. Then they fill the main cavity with epoxy. This combined approach maximizes durability.
When to Replace Rotten Logs in a Log Cabin
Some damage is too extensive for repair. Severely rotted logs that have lost significant wood mass need replacement, not patching.
Signs that replacement is necessary include deep decay extending more than an inch into the wood, decay affecting more than 25 percent of the log’s circumference, or structural failure where the log no longer provides adequate support.
Log replacement is a significant undertaking. The damaged log must be carefully removed without destabilizing the structure above it. A new log must be fitted precisely and secured properly. This typically requires professional equipment and expertise.
The cost of replacement exceeds repair by a substantial margin. But a badly compromised log that fails poses safety risks. Structural failure can damage the entire home. Replacement prevents catastrophic problems.
Professional log home contractors have experience with replacement. They have hydraulic equipment to support the structure while removing damaged logs. They can source matching logs if your home uses specialty wood species.
Chinking and Log Sealant Repair for Prevention
Chinking is your home’s primary defense against moisture intrusion. Failed chinking creates pathways for water to reach logs. Maintaining chinking prevents the rot cycle from starting.
Inspect chinking annually. Look for cracks wider than a quarter-inch. Check for areas where chinking has pulled away from logs. Gaps allow wind-driven rain to penetrate.
Recaulking is straightforward maintenance. Remove loose or failing chinking with a chisel. Clean out debris. Apply new chinking material according to product directions.
Sealant on log surfaces protects against moisture penetration. Quality sealers repel water while allowing wood to breathe. They prevent surface checking and reduce UV damage.
The effort you invest in chinking and sealing maintenance prevents soft spots from developing. This preventive work is far less expensive than repair.
Soft spots in your log home signal moisture problems that demand attention. The good news is that early-stage rot responds well to repair when you’ve addressed the moisture source.
Frequently Asked Questions
How can I tell whether a soft spot in a log home needs repair or replacement?
Use the fingernail test: press your fingernail into the soft spot. If it leaves a permanent indentation or you can dig into the wood easily, you have rot damage. Probe deeper with a chisel or awl to measure the depth. Surface rot less than 1 inch deep can usually be repaired with epoxy. Damage deeper than 2 inches or affecting more than 25% of the log’s diameter typically requires log replacement to maintain structural integrity.
What causes logs in a log home to become soft or rot?
The primary cause is moisture intrusion from failed chinking, poor drainage, or exposure to rain and snow. Wood rot occurs when moisture allows fungal growth that breaks down wood fibers. Common problem areas include corners where chinking fails, the bottom course of logs where water pools, and areas with poor ventilation. Log homes in regions with high humidity or heavy precipitation face greater risk of decay.
Can a soft spot in a log wall be repaired with wood epoxy?
Yes, wood epoxy works well for surface and shallow rot damage. First remove all decayed wood back to solid wood, dry the cavity thoroughly, apply wood preservative or borate treatment, then fill with epoxy repair filler. The epoxy hardens to become part of the log structure. However, epoxy repair is best for cavities under 2 inches deep. Extensive structural damage requires full log replacement for safety and durability.
How do I prevent soft spots and rot from returning after repair?
After repair, inspect and maintain chinking and caulking annually, especially in spring and fall. Ensure proper drainage around the foundation and away from the log walls. Keep gutters clean and downspouts directed away from the structure. Reapply wood preservative or sealant every 3-5 years. Address any new moisture intrusion immediately. Regular maintenance prevents the conditions that allow decay to restart.

Comments are closed