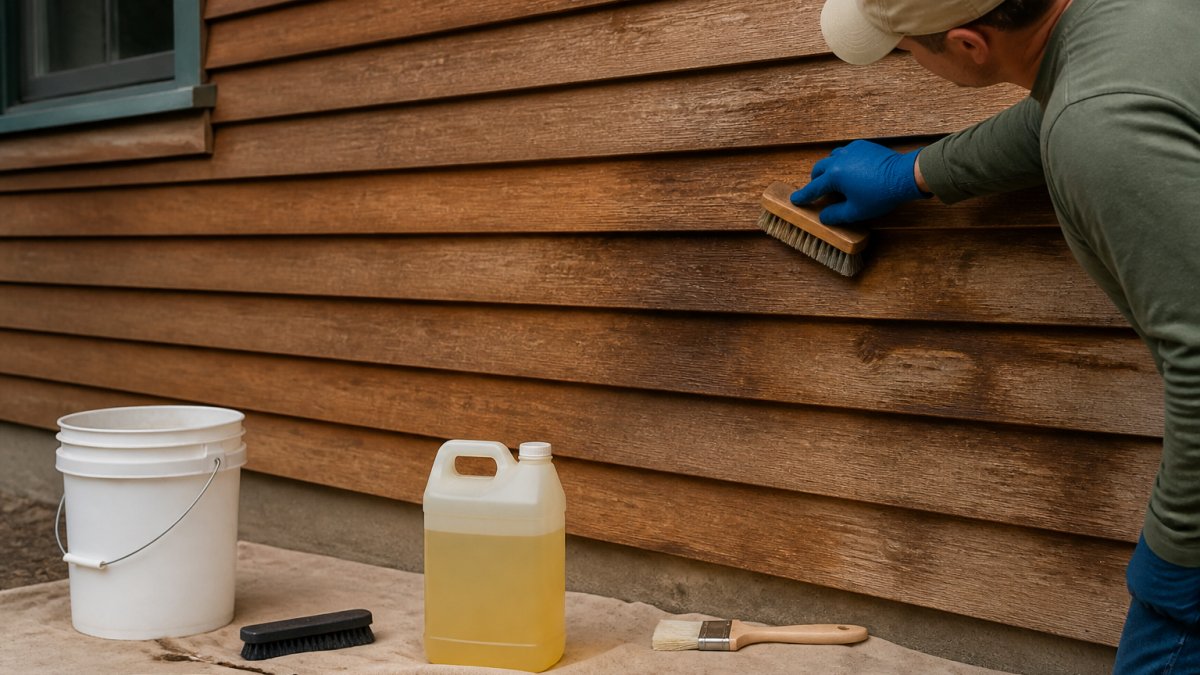
Last Updated: November 2, 2026
Quick Summary
Maintain cedar siding by washing it gently from the bottom up with low pressure, a soft brush, and a mild oxygen-bleach or detergent solution, then rinsing thoroughly. Let the wood dry 48 to 72 hours until a moisture meter reads below 15%, then apply a penetrating stain matched to the wall’s exposure and recoat on schedule.
- Never pressure-wash cedar; use a garden hose with a fan tip, a pump sprayer, and a soft-bristle brush.
- Keep cleaner dwell time to 10 to 15 minutes on a shaded, wet surface and rinse before it dries.
- Never use chlorine bleach on bare cedar; it strips color, raises grain, and blocks stain adhesion.
- Stain only when moisture reads below 15%, temperatures are 50°F to 80°F, and no rain is forecast for 48 hours.
- Full-sun walls need yearly cleaning and recoating every 3-4 years; coastal walls every 2-3 years.
Table of Contents
- What You’ll Need Before You Start
- How to Clean Cedar Siding Without Causing Damage
- Pressure-Washing Risks on Cedar and What to Do Instead
- How to Stain Cedar Siding for Even Color
- Choosing the Best Stain for Cedar Siding
- Your Cedar Siding Maintenance Schedule by Exposure
- Troubleshooting Peeling, Blotching, and Mildew
- Book a Free Cedar Siding Consultation
- Frequently Asked Questions
What You’ll Need Before You Start
Cedar siding is soft, porous wood that holds moisture longer than vinyl or fiber cement. That single fact drives every maintenance decision you’ll make, and it’s why learning how to maintain cedar wood siding comes down to protecting the wood from trapped water. Cedar failures almost always trace back to moisture that sat too long.
Gather these before you touch a board:
- Garden hose with an adjustable spray nozzle (fan tip, never a jet)
- Pump sprayer for cleaner and, later, sealer
- Soft-bristle brush with a long handle
Skip the pressure washer. We’ll explain why in a moment.
How to Clean Cedar Siding Without Causing Damage
Cleaning cedar siding safely means washing from the bottom up, using low pressure and a soft brush, and rinsing before the cleaner dries. Work in shade or on a cloudy day so the solution doesn’t flash-dry on the boards.
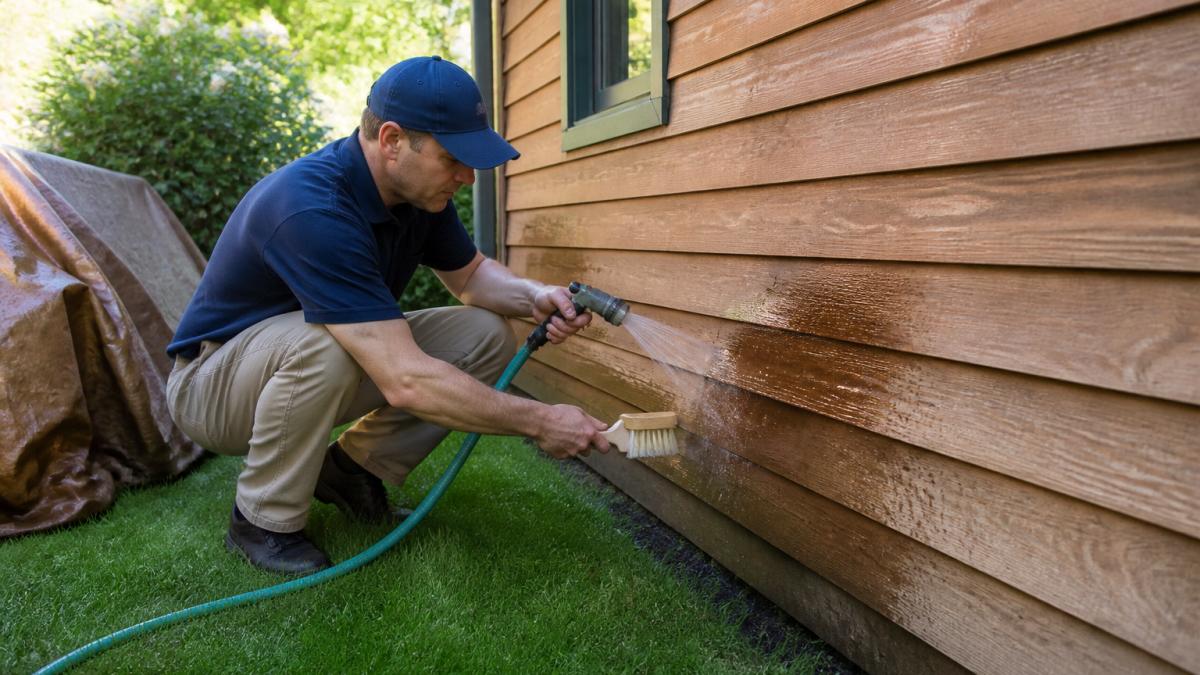
Here’s the sequence we use:
- Cover plants, shrubs, and walkways with plastic sheeting. Weight the edges so runoff can’t pool against foundation plants.
- Wet the siding from the bottom up to prevent streaking. Starting low stops dirty water from running down over dry boards and leaving tide lines.
- Apply cleaner with a pump sprayer, starting low and working up in 4- to 5-foot-wide sections so nothing dries before you scrub it.
- Let it dwell, then scrub gently with the soft-bristle brush, following the grain rather than across it.
- Rinse top to bottom with a fan spray, then rinse the plants and pavement you covered.
For homeowners who’d rather hand off the work, professional wood cleaning services can handle the process, and free consultations are available.
Mixing a Safe Cleaning Solution and Dwell Times
The safest mix for cedar is a mild oxygen-bleach cleaner diluted per the label, or a few ounces of mild dish detergent in a gallon of water. Keep dwell time to 10 to 15 minutes on a shaded, wet surface, then scrub and rinse before it dries. Never let cleaner sit in sun.
Concrete starting points, always checked against the product label:
- Oxygen-bleach cleaner (sodium percarbonate): mix to the label’s deck-and-siding ratio, typically about 1/2 to 1 cup per gallon of warm water. Warm water activates the peroxide; cold water slows it down.
- Mild dish detergent: 2 to 3 ounces per gallon of water for light dirt and pollen. More than that leaves a film that attracts dirt.
- Never chlorine bleach on bare cedar. It strips the natural color, raises the grain, and leaves salts that interfere with stain adhesion. Reserve it for mildew on previously painted surfaces, and only after a test patch.
Never mix oxygen bleach or detergent with chlorine bleach, ammonia, or acid-based cleaners. The combination can release toxic gas. Rinse the pump sprayer between different solutions.
Rinsing, Drying, and Protecting Nearby Plants
Rinse thoroughly with a fan spray, working top to bottom. Then let the wood dry for at least 48 to 72 hours before staining. Pre-wet plants before you start and rinse them again afterward to dilute runoff.
A few mechanics that keep the rinse from undoing the clean:
- Fan tip, not jet. A 25- or 40-degree fan tip at household pressure moves dirty water without driving it into end grain or behind board joints.
- Keep the nozzle moving. Holding a fan spray on one spot erodes soft grain the same way a pressure washer does, just more slowly.
- Rinse the underside of lap boards. Dirt and cleaner collect on the shadowed lower edge of each course; skip it and you get dark streaks after the first rain.
Clean one wall at a time and finish the rinse before moving on. A half-cleaned wall that dries overnight is harder to even out than one you complete in a single shaded session.
Pressure-Washing Risks on Cedar and What to Do Instead
Pressure washing damages cedar by blasting the soft fibers between growth rings, leaving a fuzzy, uneven surface that takes stain poorly. High pressure also forces water behind boards and into end grain, which is where rot starts.
If you’ve already pressure-washed a deck or siding and it looks worse, you’re not alone. Why pressure washing damages wood decks explains what happens to the wood.
How to Stain Cedar Siding for Even Color
Staining cedar siding evenly requires one thing above all: dry wood. Apply stain when the moisture content reads below 15% on a meter, in temperatures between 50°F and 80°F, with no rain forecast for 48 hours. Back-brush as you go to work the stain into the grain.
Testing for Moisture and Weather Windows
Press a moisture meter into several boards on different sides of the house. If readings vary widely, wait. Sun exposure, humidity, and recent rain all shift drying times, so check twice before you commit to a weather window.
Choosing the Best Stain for Cedar Siding
The best stain for cedar siding depends on three things: the wood’s condition, the look you want, and how much sun the wall gets. For a deeper guide, see the best stain for log homes. A penetrating oil-based stain soaks into the grain and protects from the inside, which suits weathered cedar. A water-based stain offers easier cleanup and lower odor.
Match the finish to the exposure:
| Situation | Best Finish | Why |
|---|---|---|
| Weathered, gray cedar | Penetrating oil-based stain | Feeds dry wood, absorbs evenly |
| New or recently sanded cedar | Water-based stain | Cleanup is easier, low odor |
| Full sun, south-facing wall | Oil-based with UV protection | Resists sun fade |
| Shaded, damp side | Breathable penetrating stain | Lets moisture escape |
| Previously film-coated wall | Match existing coating | Prevents peeling mismatch |
A Decision Path, Not Just a Table
Most guides hand you a table and stop. The harder question is what to do when your wall doesn’t fit one row cleanly. Work through these four questions in order:
- Is the wood bare, or is there an existing coating? Rub a rag with mineral spirits across a board. If color lifts onto the rag, there’s a coating. If the rag stays clean and the wood drinks the spirits, it’s bare or the coating has fully failed. Never apply a penetrating stain over a sound film-forming coating; it can’t reach the grain and will sit on top and peel.
- Is the existing coating sound, peeling, or unknown? A sound film coating should be cleaned and recoated with the same product family. Peeling or chalky coatings need to be stripped or sanded back to bare wood before you switch. Unknown history is the most common cause of blotching, because a new oil stain over an old water-based sealer absorbs unevenly.
- How much sun does the wall get? South- and west-facing walls take the most UV. On those walls, prioritize a finish with UV absorbers and plan to recoat on the shorter end of the interval. North-facing and shaded walls dry more slowly, so favor breathable penetrating products over film formers that trap moisture.
- What look do you want? A natural, grain-showing look points to a transparent or semi-transparent penetrating stain. A uniform, painted look points to a solid-color stain, which behaves more like paint and needs more surface prep. Anything in between is a semi-transparent or semi-solid stain, and the sheen and color shift after the first season, so test on a spare board.
Finish selection is a compatibility decision first and an appearance decision second. The right product on the wrong substrate fails faster than a mid-grade product on a properly prepared one.
Oil-Based vs. Water-Based: What Actually Changes
- Oil-based penetrating stains soak into the grain, leave the wood breathable, and are forgiving on weathered cedar. They typically need a longer dry window and have stronger solvent odor, and some formulations require a separate topcoat for maximum UV protection.
- Water-based stains dry faster, clean up with water, and have low odor, which matters on occupied homes. They can raise the grain slightly on bare cedar, so a light sanding between coats is common.
- Film-forming sealers and varnishes give a smooth, uniform surface but trap moisture if water gets behind them, which is the leading cause of peeling on cedar. Use them only where the wood is fully dry and the coating can be maintained on schedule.
Testing Before You Commit
Apply the candidate finish to a spare cedar board or an inconspicuous area and let it cure for the full label time. Check color, sheen, and how the grain reads in both direct sun and shade. A finish that looks right on a sample in the garage can read two shades darker on a sunlit wall. Keep the test board labeled with the product name and date so you can match it at the next recoat.
Your Cedar Siding Maintenance Schedule by Exposure
A cedar siding maintenance schedule should follow exposure, not the calendar. Full-sun walls fade faster. Shaded walls grow mildew faster. Check the finish every spring and fall and re-coat when water stops beading.
| Exposure | Inspect | Clean | Re-coat |
|---|---|---|---|
| Full sun | Every 6 months | Yearly | Every 3-4 years |
| Partial shade | Every 6 months | Yearly | Every 4-5 years |
| Deep shade, damp | Every 3 months | Twice yearly | Every 3-4 years |
| Coastal or windy | Every 3 months | Twice yearly | Every 2-3 years |
Cedar siding is a natural wood product, and its service life depends heavily on moisture protection and UV protection staying intact. When the coating fails, the clock starts.
Troubleshooting Peeling, Blotching, and Mildew
Peeling, blotching, and mildew on cedar siding almost always point to moisture or application problems, not bad wood. Peeling means water got behind a film-forming coating. Blotching means uneven absorption, often from staining damp or unprepared wood.
What most guides miss is that these are symptoms. If you spot soft spots, dark streaks, or paint that bubbles near joints, check whether hidden rot is developing behind the boards.
Book a Free Cedar Siding Consultation
Cedar holds up beautifully when it’s cleaned gently, dried fully, and finished on schedule. Get any of those steps wrong and you’re back to peeling and rot within a few seasons.
If you’d rather have a trained eye assess your siding, Midwest Maintenance LLC offers free consultations. You can also book cedar siding restoration in Brookfield, WI. Contact the company to discuss your home’s exposure and a plan for your siding.
Frequently Asked Questions
Do cedar siding shingles need to be treated?
Yes. Western red cedar is a soft wood, and untreated boards take on moisture, UV damage, and mildew within a few seasons. A penetrating stain or wood sealer slows water absorption and blocks UV light, which keeps the natural wood appearance from turning gray. Treat new shingles once they have dried out after installation, then recoat on a schedule that matches your sun exposure and climate conditions.
Is it okay to pressure wash wood siding?
Pressure washing cedar siding at high settings forces water into the grain and can raise the soft fibers, leaving a fuzzy surface that looks worse than before. Use a garden hose with a spray nozzle and a soft-bristle brush instead. If a professional uses a pressure washer, it should be on a low setting with a wide fan tip, and the board should be allowed to dry fully before any stain or sealant goes on.
How often should cedar siding be stained or sealed?
A cedar siding maintenance schedule depends on exposure. Fully sun-blasted walls may need recoating every 3 to 5 years, while shaded or north-facing walls can stretch to 5 to 7 years. Check by sprinkling water on the wood: if it beads, the coating is still working, and if it soaks in, it is time to clean and recoat. Inspect every spring for mildew, stains, and soft spots.
How can you tell if cedar siding needs maintenance?
Look for graying, chalky residue, mildew, or algae on the boards. Run a hand along the surface to feel for fuzziness, and press a screwdriver into the wood at the base of the wall and around window trim. If the tip sinks in easily, moisture has reached the wood and the board needs repair before you stain. Peeling or blotchy coating also signals that surface preparation and a fresh coat are overdue.
Cedar siding rewards owners who stay ahead of moisture. If your boards are showing early warning signs, or you want a maintenance plan that fits your climate, Midwest Maintenance LLC can help. We offer free consultations, dedicated wood care expertise, and comprehensive restoration for both new and older structures. Get started with Midwest Maintenance LLC and keep your cedar looking sharp for decades.


Comments are closed